The background.
A research project has just landed that involves using our Phasespace motion capture system. Since its been idle for some time, I turned it on to check it out and remind myself how all the bits worked. Obviously it was broken.
So after replacing a video card in the hub computer and figuring out that the batteries in the LED driver units were dead, I finally got the rig up and talking. Then found that the calibration wand was non-functional. Goes without saying really... IGOR rule 101 states "Any equipment left in the proximity of students will be TOUCHED, no matter what you say, how well its locked up or how many signs are erected."
The wand is one of those "damage magnets"! Its just too visually attractive. People are fascinated with it and will ask about it first out of all the equipment. It's just too pretty to live!
Anyway, today's IGOR hack-of-the-day is to build a calibration wand for a Phasespace (http://www.phasespace.com/) motion capture system.
Step 1 Scrounging
Find something to use as the wand shaft. Search the store rooms and the junk pile in my office. Nothing... nothing ... nothing. Almost going to go to metal fabrication and scrounge there when I find an old walking stick that was given to someone as a joke. Perfect. Also it has a bit more chic than a length of plastic pipe or whatever else I might have found.
Step 2 Procurement
Think quick and figure out how to attach a string of Multi-LED's to the stick without destroying the multi-LED's. They have a Velcro backing so all I need is some Velcro and some hot-melt glue. Time for a "Bunnings Run"(TM)
Shopping list
Hot-melt glue gun and reloads
Some Velcro cable holding tape
More cable ties

Step 3 Assemble the stick


When one of the pads is out of alignment. Rip it off and do it again.
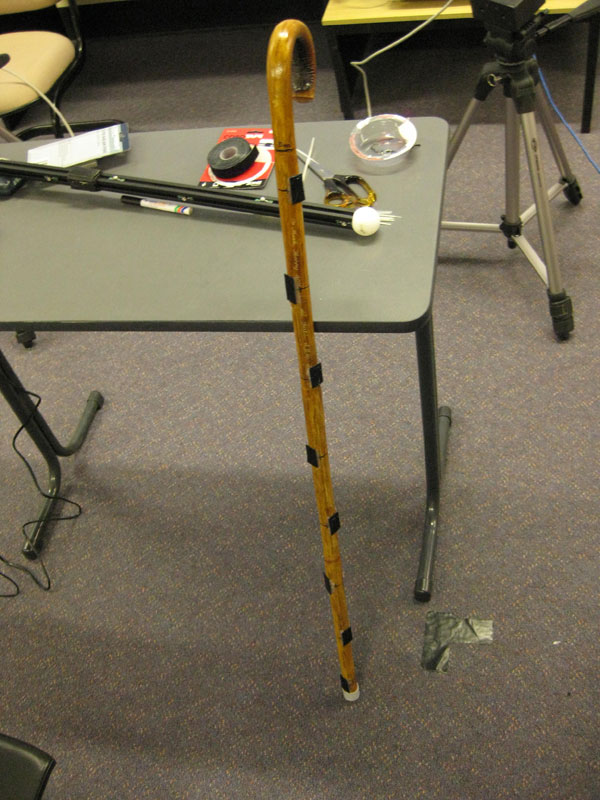
And a final overview of the stick and Velcro assembly.
Step 4 Building the wiring loom
Wire spool
Punch down tool
Punch down connectors

Now measure out the wire. Remember to add a bit of slack between each LED position as they are fiddly to position and you don't want them under any tension. Velcro vs wire will also end one way. Wire wins!
Careful of the punch down tool too. It doesn't really work the way its intended on heavy insulated speaker wire. Mostly it tries to puncture your finger rather than securing the wire.

I use a knife to split the wire strands and then remove some of the insulation to help the punch down connector make a good connection.

Once you have all the connectors on and facing the right way. Put some hot glue in the back of each one to make sure its not going to come off the loom. Let it cool and pull off the hot glue cobwebs.
Step 5 Assembly

Assemble the stick. Lots of cable ties make it look better.

Add a LED driver. Cable ties make everything good.

Now, plug in and turn the whole system on, put it into calibration mode and you can test your wiring. Note how only three of the eight LED's work. Debugging time! Cut off all the cable ties....
Now take it apart again, pull the cable out of the connectors and hot glue, clean the glue off, cut away a little bit more insulation and re-assemble the wiring loom. This time, before you put the glue in each connector, assemble and test using calibration mode again. If the connector still does not work, cut away a little more insulation until you have bare wire and then punch it down into the connector again. When all are working. Glue them up again.

I now have a functional Calibration Wand. All I need to do is change the values in the wand.rb file to match the position of the LED's on this wand and I can get the system calibrated. Get out the ruler and begin measuring...
And that's all folks. Pretty straight forward.
No comments:
Post a Comment